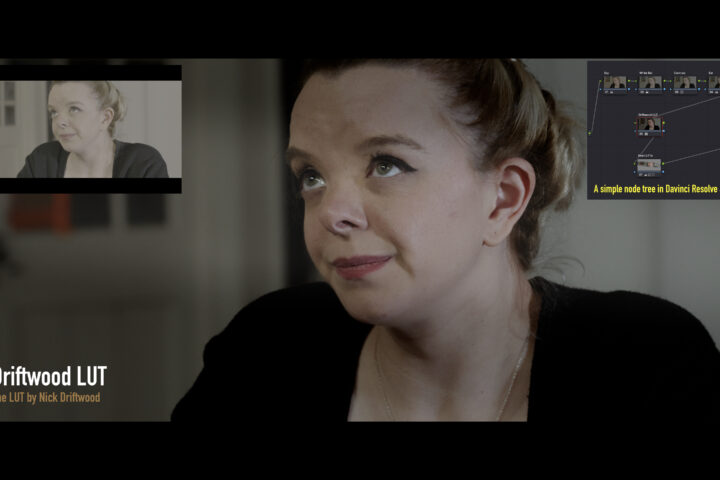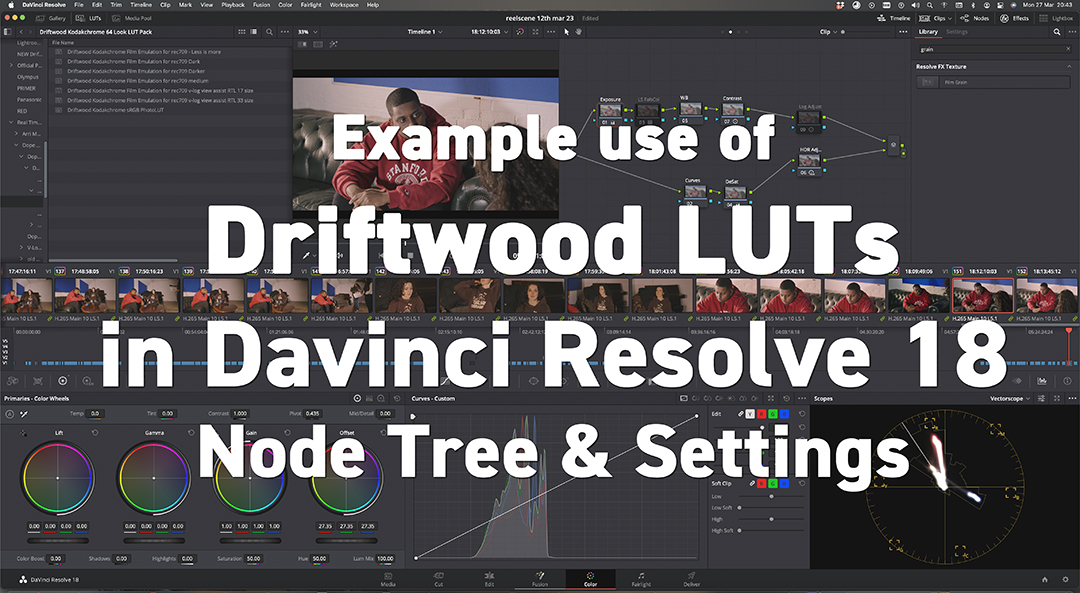
Here is my starting point node tree for Davinci Resolve 18 and settings for Davinci Wide Colour Gamut grading.
I’m mainly exporting to Rec709 Gamma 2.4 (for broadcast TV) or Gamma 2.2 (for YT/web) and so most of my corrective LUTs are for Rec709, and so with this example tree lets go that route and get started.
Gamut
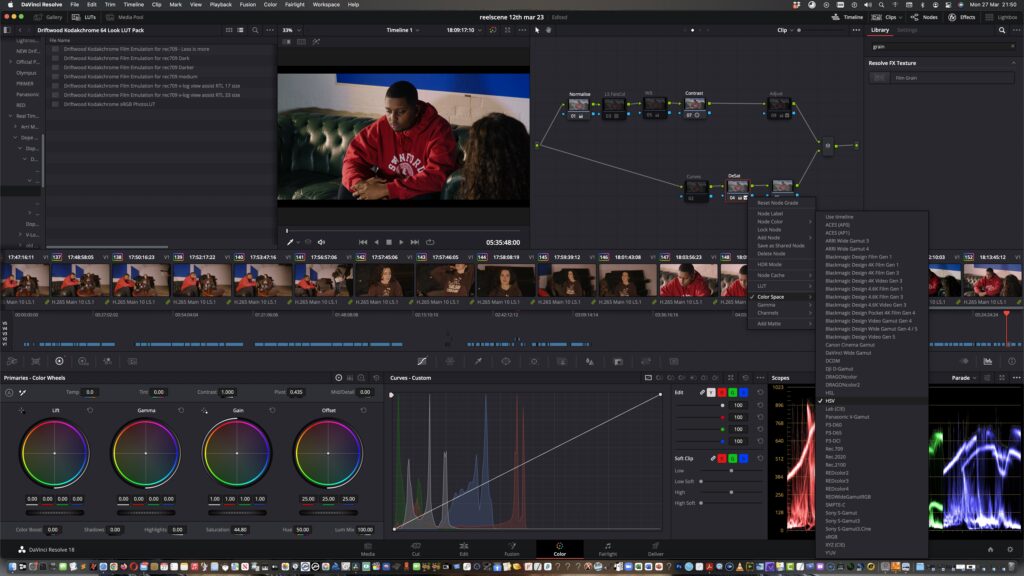
For Lumix cameras I use similar settings to others to make use of the fullest / widest gamut available and that is Davinci Wide Gamut (DWG). Every other gamut for export fits inside and that includes ACES too!
As an analogy, think of a range of gamuts as Russian dolls. The biggest doll is DWG the next doll to fit inside it is ACES, then for example V-Gamut or other ‘Log’ gamuts, etc… and then of course there’s the HDR Rec2100/BT2020, and SDR ranges of P3 and Rec709 which are even smaller dolls offering much less tonal range than the biggest – Davinci Wide Gamut.
Settings
So we setup Davinci Resolve to be Davinci YRGB Color Managed but without automatic color management because we are setting it up for Lumix V-Log V-Gamut supported cameras – as shown in the pic below. The timeline will make use of Davinci WG/Intermediate using a huge working luminance of 10,000 nits to offer better luminance mapping when we finally export as Davinci handles all the mapping and transforms without the need of using CST (Color Space Transforms) to get to our Output Color Space. Our Output is of course Rec709 Gamma 2.4 or you can use Gamma 2.2 for web//You Tube.
Note: If you need to follow strict 64 to 1023 luminance values to grade for sRGB output you can change the output DRT to ‘Simple’ (now notice how the range values change when you click save and look at your parade waveform).
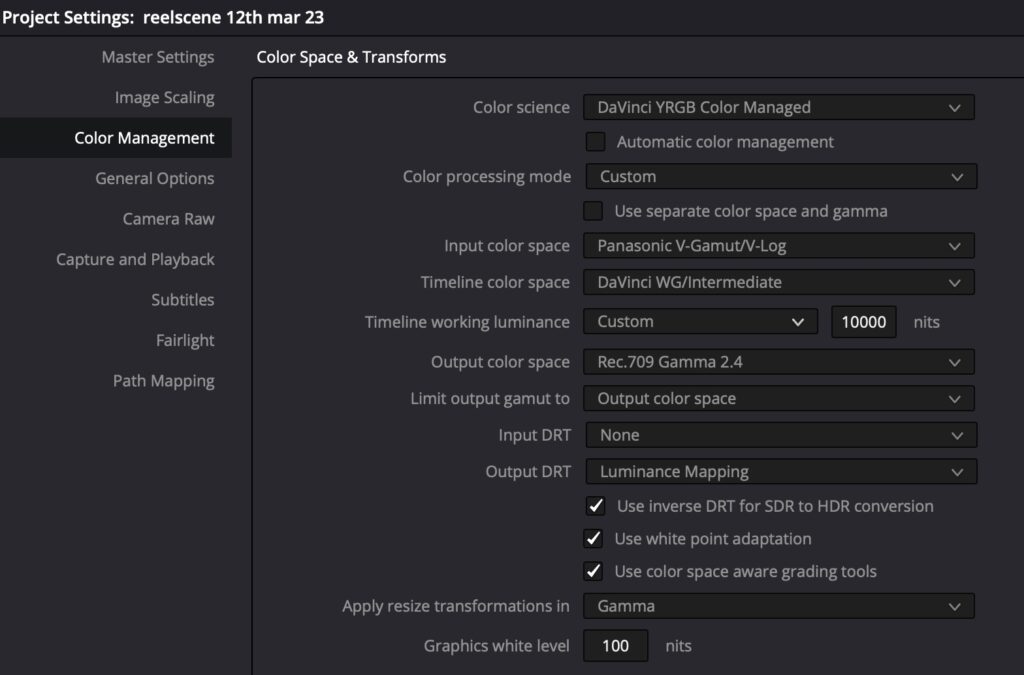
Once you’ve clicked ‘Save’ you should see the changes reflect in your V-Log clips if already placed onto the timeline – if not go ahead and import your clips!
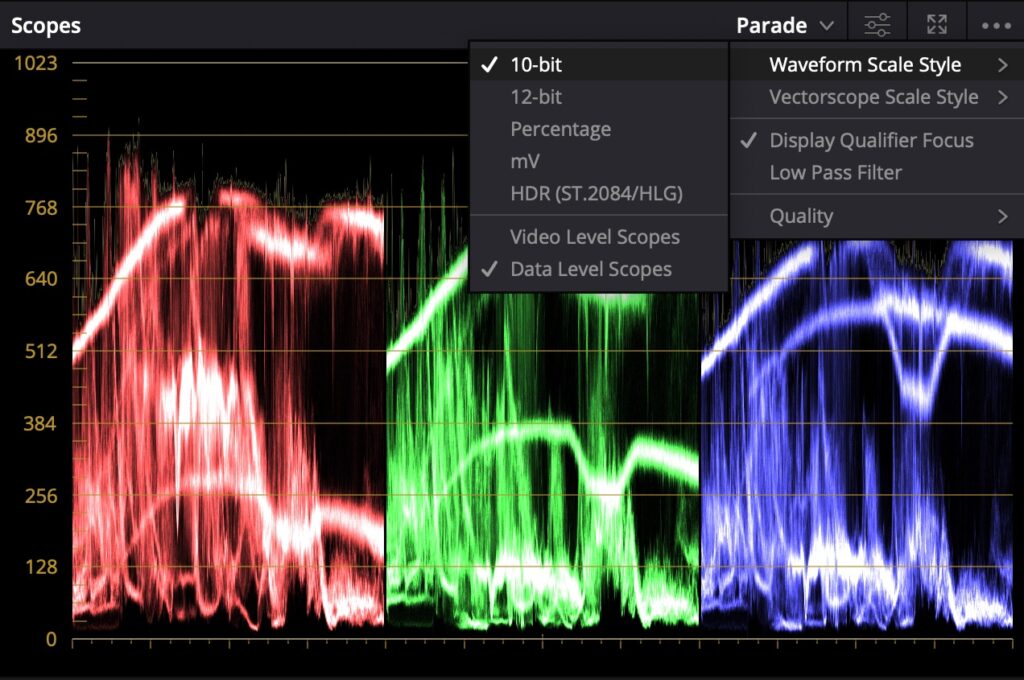
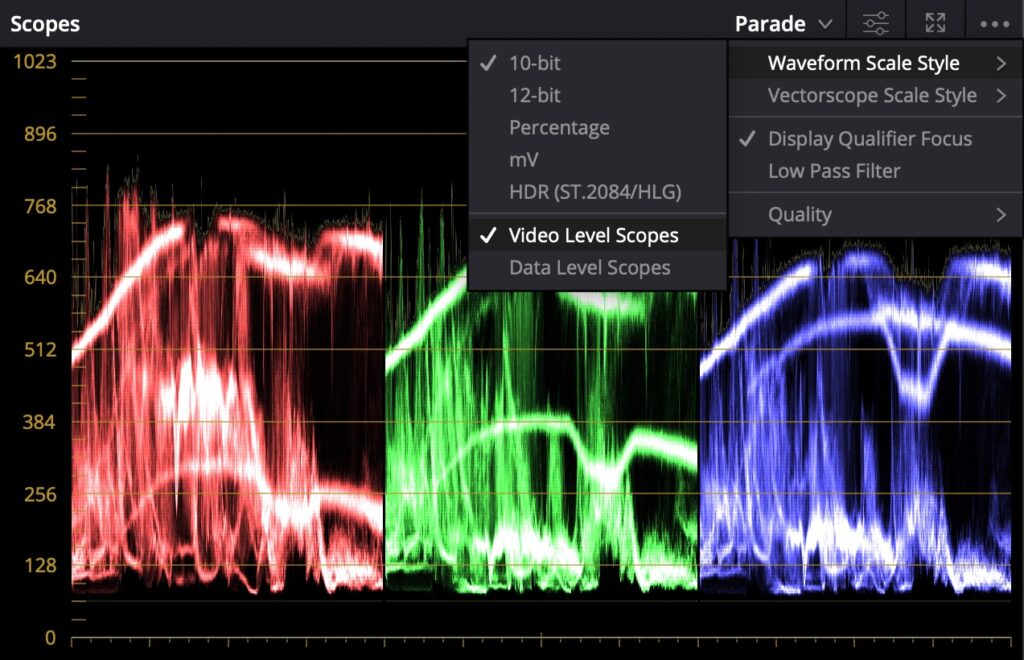
Let’s quickly setup our scopes.
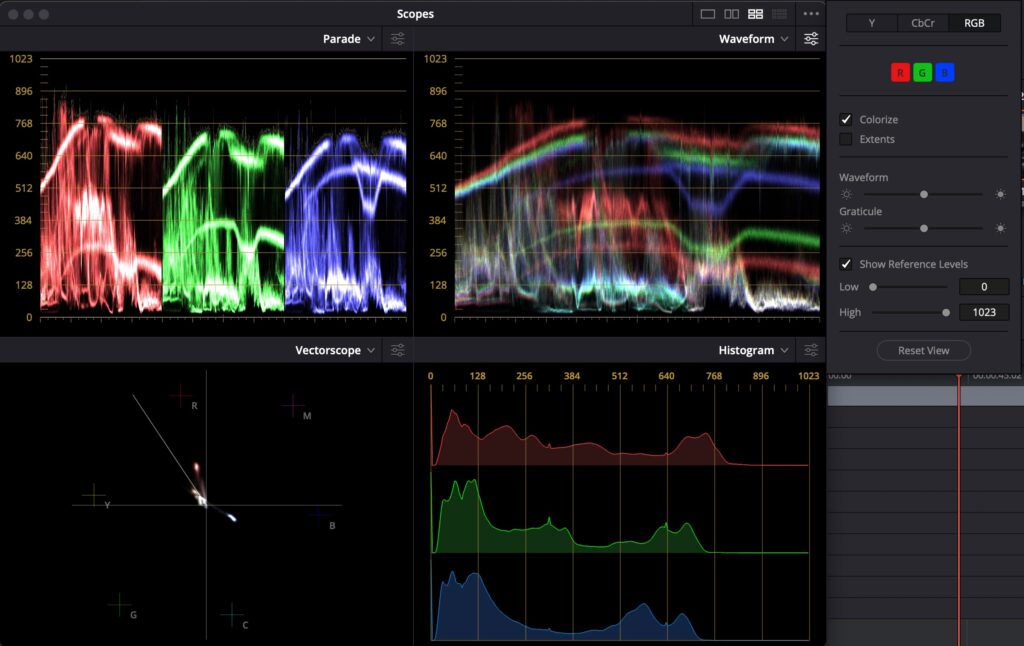
Waveform / Parade (for showing RGB)
Use 10-bit values for 10-bit V-Log clips. I use Full range 0-1023 Data levels but you can use Video Levels if you wish to stay conformed to broadcast luminance levels. Video levels show a safe raised black point and lower white point than data levels.
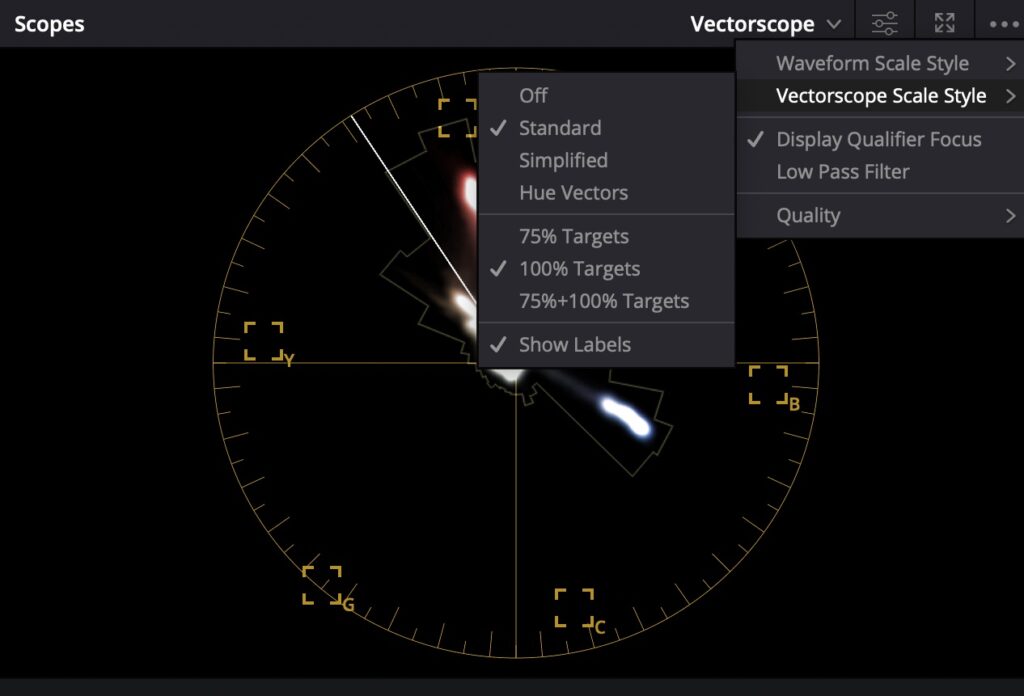
Vectorscope

Now lets setup the clips. In the following example I like to grade in groups of scenes so I add my similar clips to separately named Groups as below. Right click over a clip and Add it to the Group option in the drop down menu at the top.
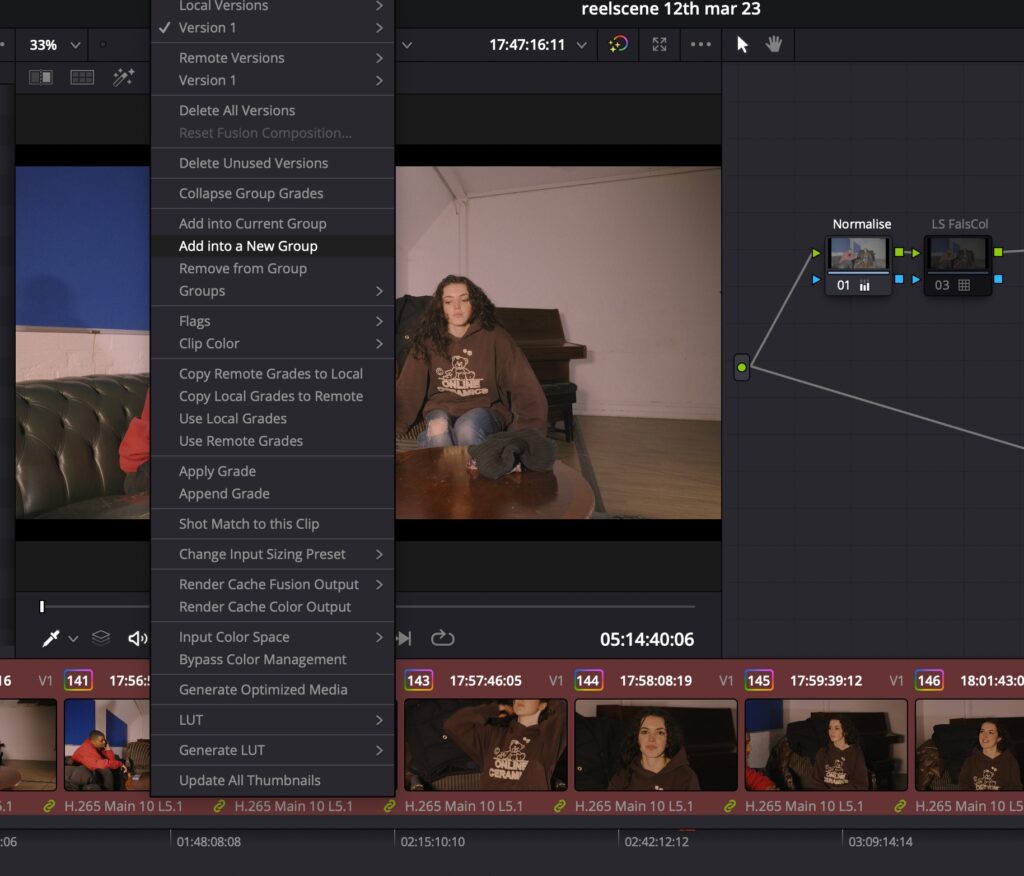
You can see the Groups you’ve made or add individual/groups of other clips to the same or different Group. This keeps things organised and grades easier to manage with similar scenes.
Now that the clips are organised into groups we can setup our grading node trees in specific sections.
The Group Post-Clip
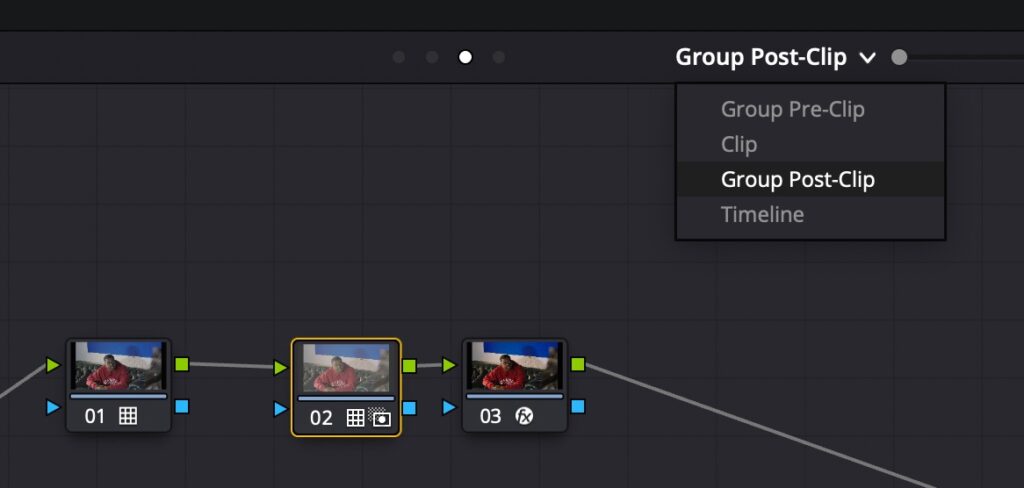
The Group Post-Clip node tree is where I put my Driftwood LUTs, Filmic emulations and Grain FX. Everything else regarding Primary, Log, HDR and secondary grades will take place BEFORE this group. Hence it’s name – Group Post-Clip.
Here’s images of an example in this current Group Post-Clip Node tree.
Node 1 – I place my Driftwood Lumix S5II v2B color corrector LUT. You could use other colour corrective look LUTs here in its place.
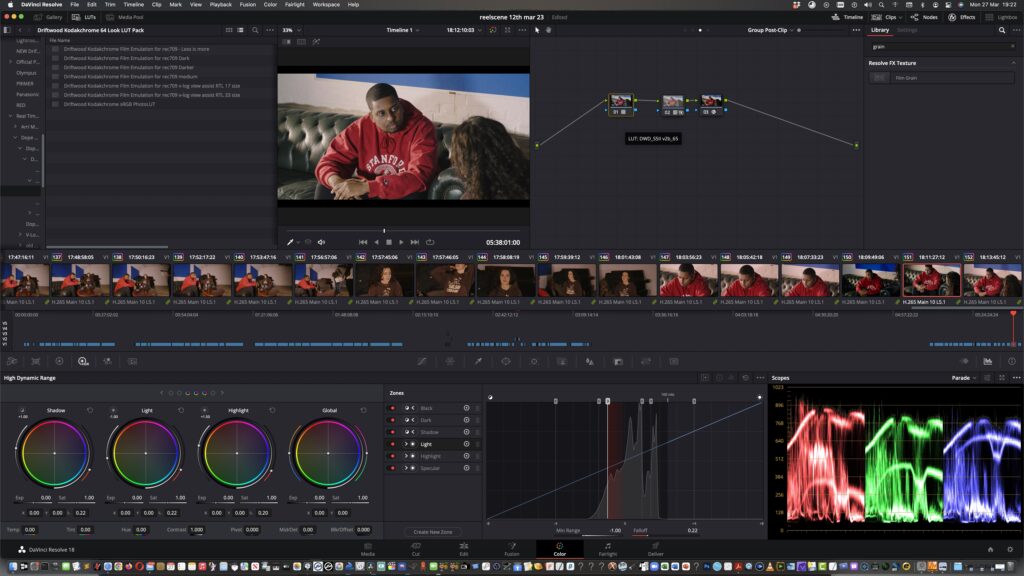
Node 2 Is my Film emulation LUT (this one is called Kodakchrome 64 ‘Less is More’ LUT. It’s strength has been lessened by using the Key Output Gain window to nearly 50% of its total strength. You could use other filmic emulations here in its place.

Node 3 – The final and third node in this tree is my final Film Grain FX node (simply create a node and drag over from the Effects Menu Film Grain and choose your preferred grain size and strength).
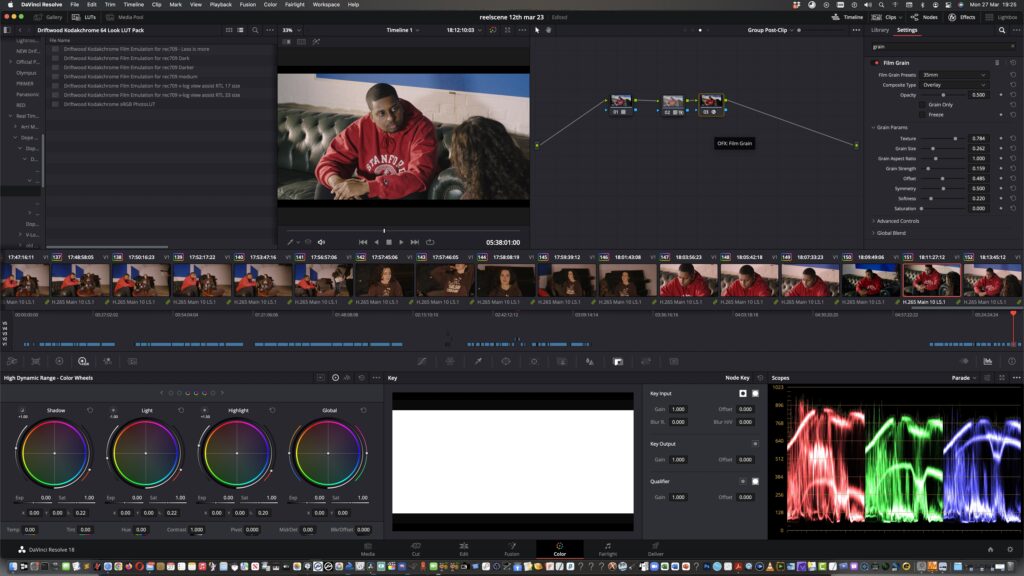
If you can’t read these images, right click to download them to your desktop and view enlarged.
The Clip Node Tree
Here I place into the CLIP section our Exposure Offset, WB, Contrast & other Primary, secondary and SDR/HDR wheels nodes. My secondaries in this particular grade are not showing. Secondaries are things like tracking and changing skin tones / masks and adjustments for those who do not know.
The Clip Node Tree nodes inform Davinci to perform its grades BEFORE the Group Post-Clip set above. And each clip grade is for that particular / current clip which is unlike the Group Post-Clip nodes whose node grades apply to ALL clips in the Group.
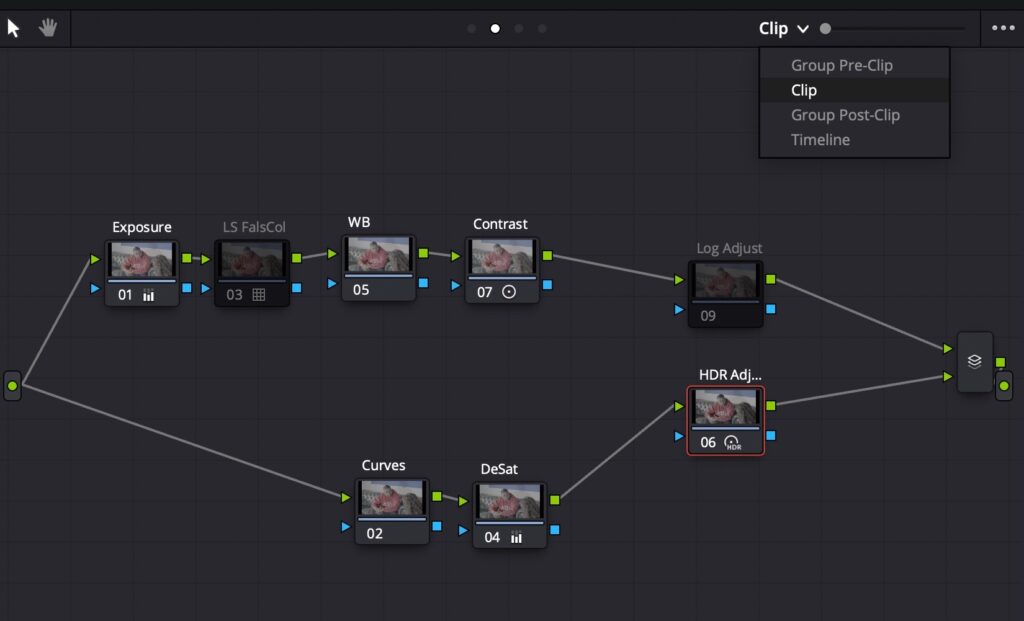
Here is what is going on and in the order I prefer for a basic grade – if you wish to download the screen grabs for each node right click and save to your desktop to enlarge the view.
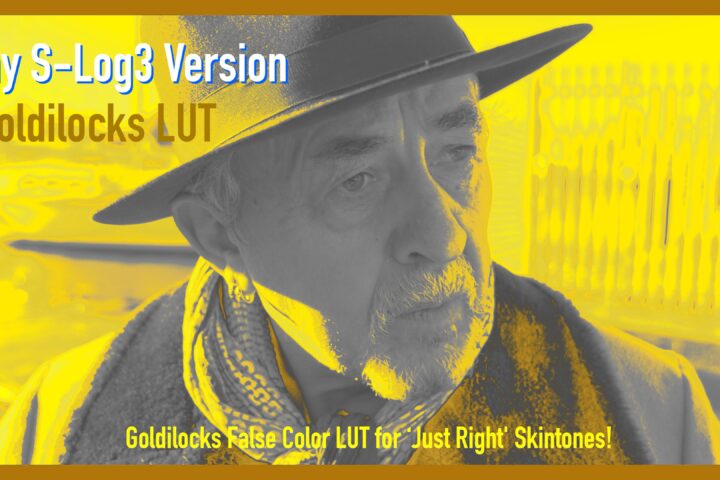
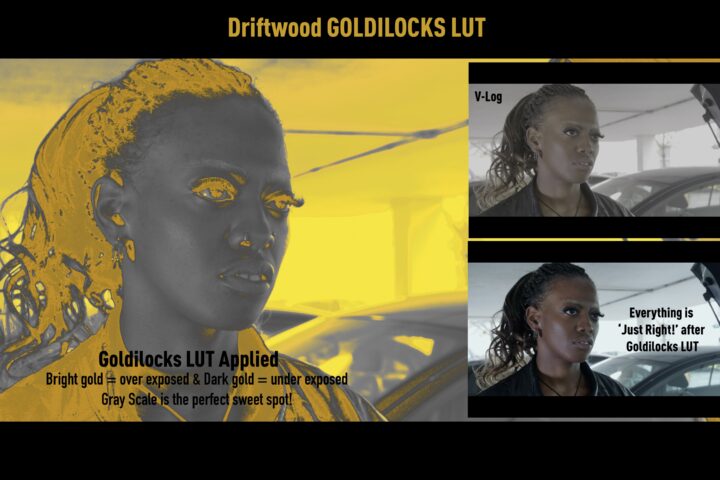
1/ Exposure Adjust Node – A quick offset adjustment on the Primary Wheels to bring everything into correct exposure taking particularly attention to your subject matter exposure. I often use a False Colour LUT (which is greyed out to the right of this node) to check exposure before I switch on any other clips in this node tree. The LUT will be released soon.

2/ White Balance Adjust Node – R,G,B fine tune on the Offset Wheel to achieve a white balance with finesse. You could also use the Auto White balance buttons, the Temp / Tint or the HDR White Balance Offset sliders to adjust your white balance here on this node.
3/ Contrast Node – You can either use the Primary Wheels Contrast and Pivot Adjustment or the Log Wheels with its additional Ranges to control contrast. V-Log middle grey on the pivot is 0.433 so please remember that as contrast revolves around this mid point.

4/ Curves Node – if you like to use curves, including color adjustment curves, Sat vs Sat, Sat vs Luma etc… I do all this kind of work on this node. 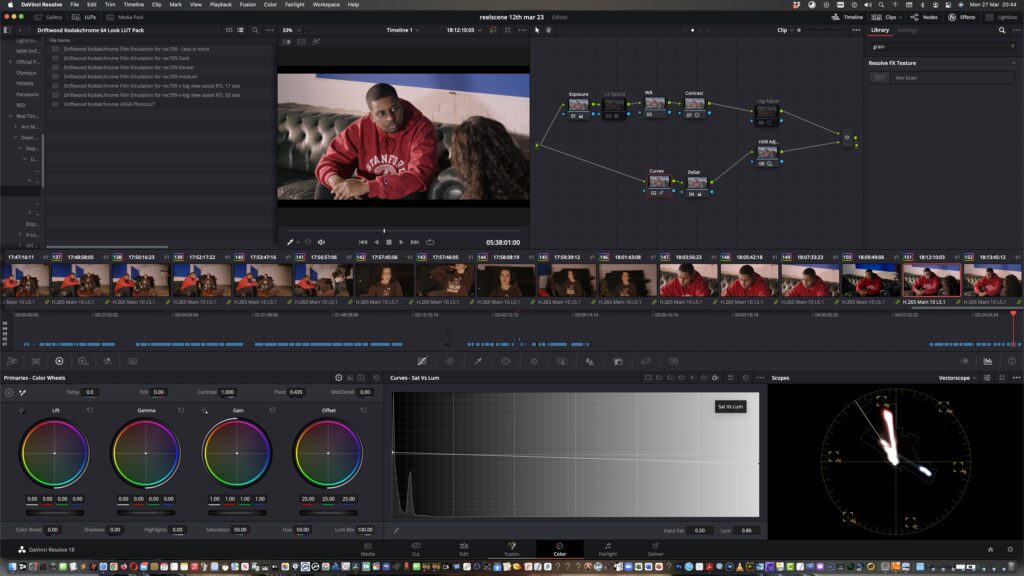 These curves will enable you to achieve lovely gentle roll-offs for saturation and luma. These are great to bring back colour in your skies or areas to brighten/darken and especially used with a mask to key off areas.
5/ Saturate or Desat node – As it name suggests I use this node for only doing saturation adjustments. You can switch your colour Space for this node to HSV and switch off channel 1 and 3, keeping 2 on for Saturation. Then you can use Lift, Gamma and Gain Primary wheels to adjust a roll off saturation in the exposure zones. Alternatively, you can disable this node and do it in the HDR Wheels panel which Im now doing much more.
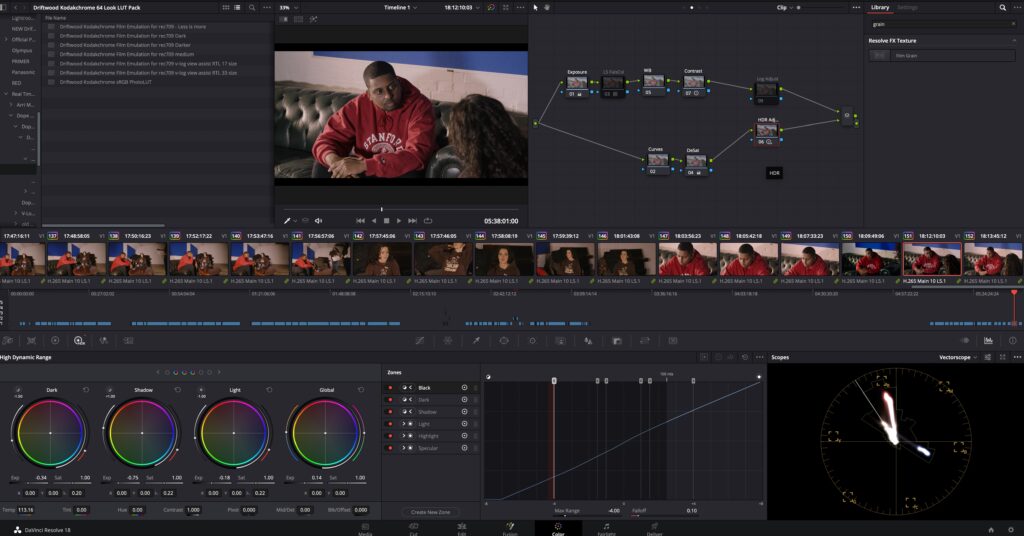
6/ HDR / Log Extra nodes for further adjustments followed by secondaries
I can do smaller more accurate adjustments of colour in the Log wheels or HDR wheels (plus better zonal tonal & luminance shifting in HDR). The HDR wheels are NOT just for High Dynamic Range material, they can also be used as I do in a grade setup for SDR work. Try them out they are awesome.
And that’s basically it. So to summarise, I setup my Groups, have nodes for Group Post-Clip placed first and use my colour correction LUTs like Dope709 or S5II v2B correctors (you could use others here), film emulation and grain. Then I go into each clip – selecting the CLIP tree node tree – and create normalising or PRE Grades, you could also apply a ‘Grab-Still’ grade or power grade into this node tree with your own primary and secondary node corrections. When done, Export to the colour space selected in the Settings. Straight forward.
You DON’T have to use my method, there are quite a few node tree methods out there on the World Wide Web to search for. But get yourself used to ordering your grades and stick to labelled nodes so that you know where to go to and what is happening. Regularly save your grades and stills or power grades so that you can re-use them as it takes time to setup from the beginning. Then just replace LUTs or other items with different LUTs or ideas.
The LUTs I used are available FREE on this site. Any questions, ask away on the Facebook Group ‘Real Time LUTs’.
Here’s the Power Grades in a zip for you to download and import into Davinci Resolve: DriftwoodPowerGrades
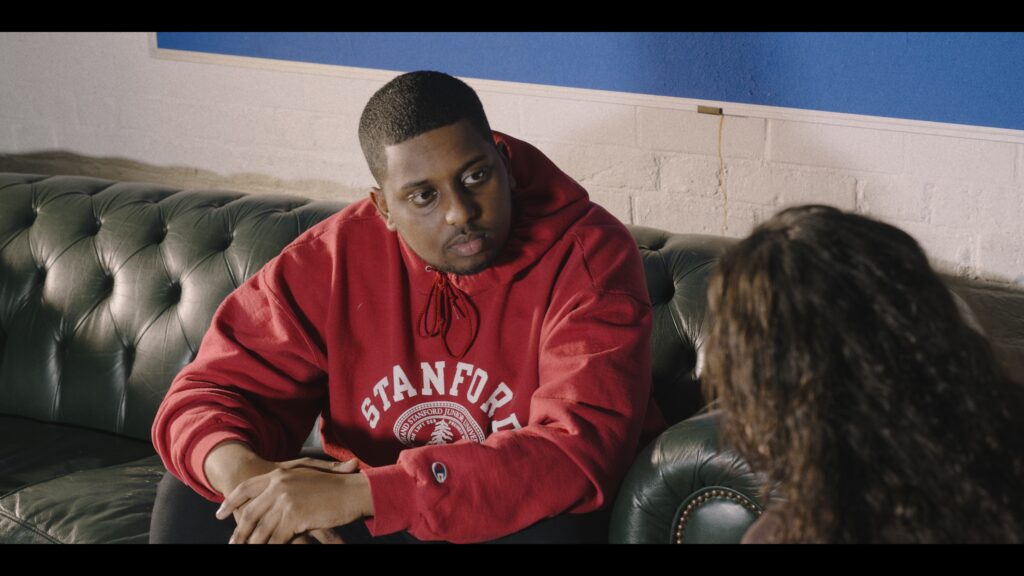
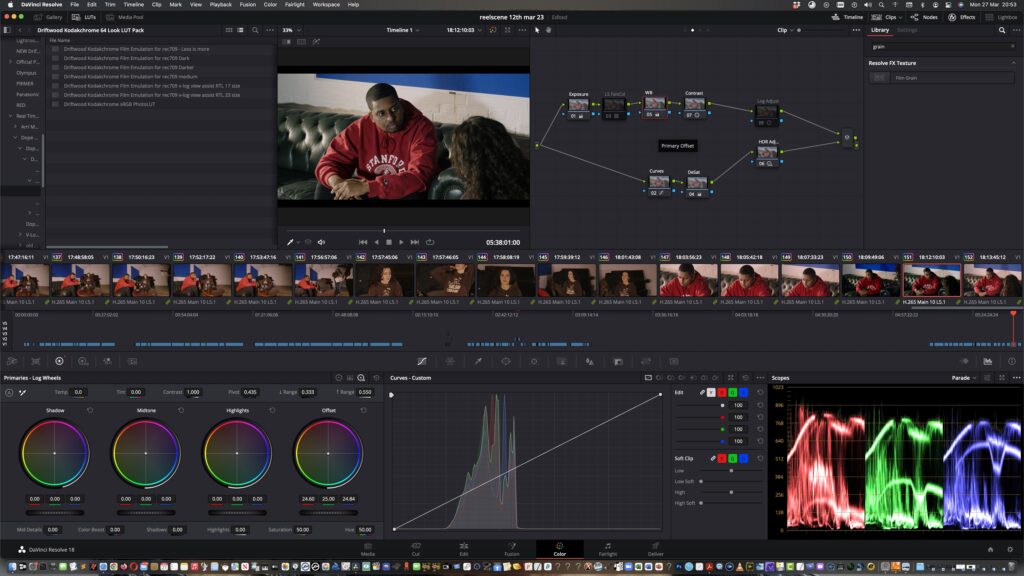
below: Getting there… a near Final Grade!